*
 Here,
a trial length of mitered 2"x6" [actually 45x145mm] was screwed to a
couple of off-cuts of the 4"x4 posts." This gave me a useful gauge to try
around the entire octagon of footings.
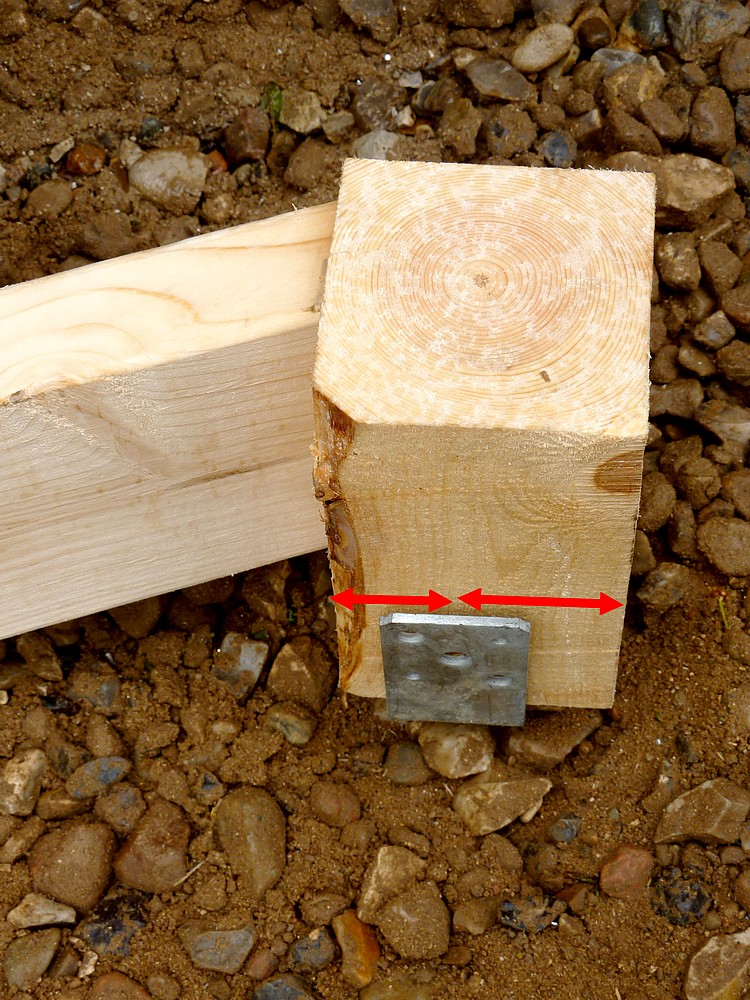
Here,
a trial length of mitered 2"x6" [actually 45x145mm] was screwed to a
couple of off-cuts of the 4"x4 posts." This gave me a useful gauge to try
around the entire octagon of footings.Getting the sharp edge of the miters flush with the outer corners of the 4"x4" required some care. The cladding will be screwed to both the posts and the cross braces so, ideally, both need to be flush with each other at the outer edges.
The 100mm [4"] chipboard screws need a lot of torque unless the holes are pre-drilled 4mm. The maximum torque setting of 15 was not quite enough on my DeWalt rechargeable drill to sink the screws fully home in either gear. The only remaining setting is for drilling and this has no slipping clutch. So the drill handle turns viciously when the screw jams tight.
 I
think I will invest in a self-countersinking drill holder to match the
needs of these NKT screws. This will save a lot of time trying to bring
the boards exactly to the outer corner of the 4"x4"s. I'll just need to
run the drill in to ensure exact placement of the 2x6s. Failing that I
can pre-drill 4mm through the 2x6s to enter the the 4x4 for board
location prior to driving the screws.
I
think I will invest in a self-countersinking drill holder to match the
needs of these NKT screws. This will save a lot of time trying to bring
the boards exactly to the outer corner of the 4"x4"s. I'll just need to
run the drill in to ensure exact placement of the 2x6s. Failing that I
can pre-drill 4mm through the 2x6s to enter the the 4x4 for board
location prior to driving the screws.I also discovered that rotating the footing brackets by 90° allowed the 2x6s to sink much lower without obstructing the brackets. It also allowed a much greater degree of leeway regarding the separation of the footings.[Arrowed in the image above] Originally, I was placing the brackets on either side. Rather than inside and outside the octagon's perimeter. The new position allows me to mass produce the cross braces without measuring the exact distance between each footing. The distances between centers are within an inch of each other anyway.
 Tradesmen
use compound miter saws on building sites every day. They would
probably see my project as rather small beer. I should have gained some
valuable practice with the saw by the time I have finished the building.
Tradesmen
use compound miter saws on building sites every day. They would
probably see my project as rather small beer. I should have gained some
valuable practice with the saw by the time I have finished the building.I still need to overcome the floppiness of the totally crap DeWalt, adjustable material stops. Folding, adjustable height legs, to prop up the equally floppy, extending support arms is high on my list of things to do. For short, lightweight picture frame moldings these saw stands are okay. Anything with any length or weight is hopeless unless supported at the correct height.
Why DeWalt omitted drop-down, adjustable legs as standard for their tool support stands is anybody's guess. Without a prop the extended arms and length stops are all but worthless! I have just found a YT review showing optional support legs but at a truly ridiculous price. A length of 1"x2" should do. Then all I need is to arrange a stop which actually works! Shame on DeWalt for penny pinching and then profiteering on accessories.
Click on any image for an enlargement.
*
No comments:
Post a Comment