 Both
worm support plates are now roughed out. I used the lathe in slowest
back gear to drill the 16mm holes and large circle for the axis shaft.
Backed up by tailstock pressure I was able to work slowly and steadily
through the plates without snatching. It takes a very serious pillar
drill to manage such large drills and few non-industrial pillar drills
run slow enough. The edges of the plates were allowed to rest on the cross slide to
avoid unwanted rotation as they were being drilled.
Both
worm support plates are now roughed out. I used the lathe in slowest
back gear to drill the 16mm holes and large circle for the axis shaft.
Backed up by tailstock pressure I was able to work slowly and steadily
through the plates without snatching. It takes a very serious pillar
drill to manage such large drills and few non-industrial pillar drills
run slow enough. The edges of the plates were allowed to rest on the cross slide to
avoid unwanted rotation as they were being drilled.Even the cheapo Millarco hole saw worked well at such very low rpm with plenty of lamp oil for cutting fluid. It never had a chance to overheat and cut through in a couple of minutes working [slowly] from both sides for neatness. The 6mm center hole was pre-drilled of course.
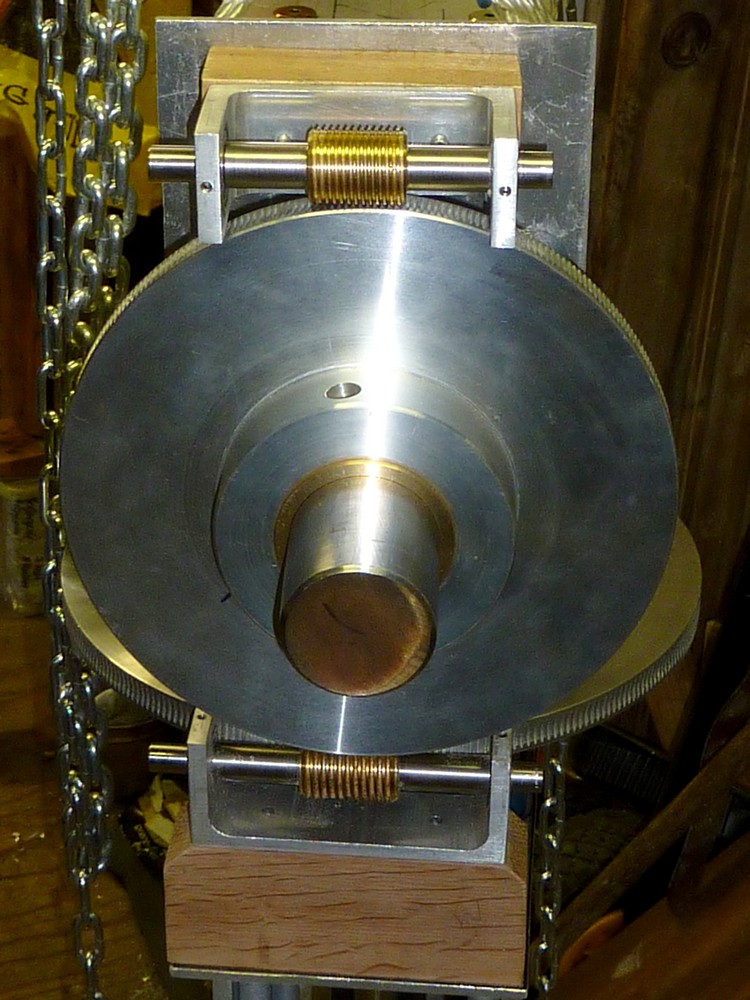
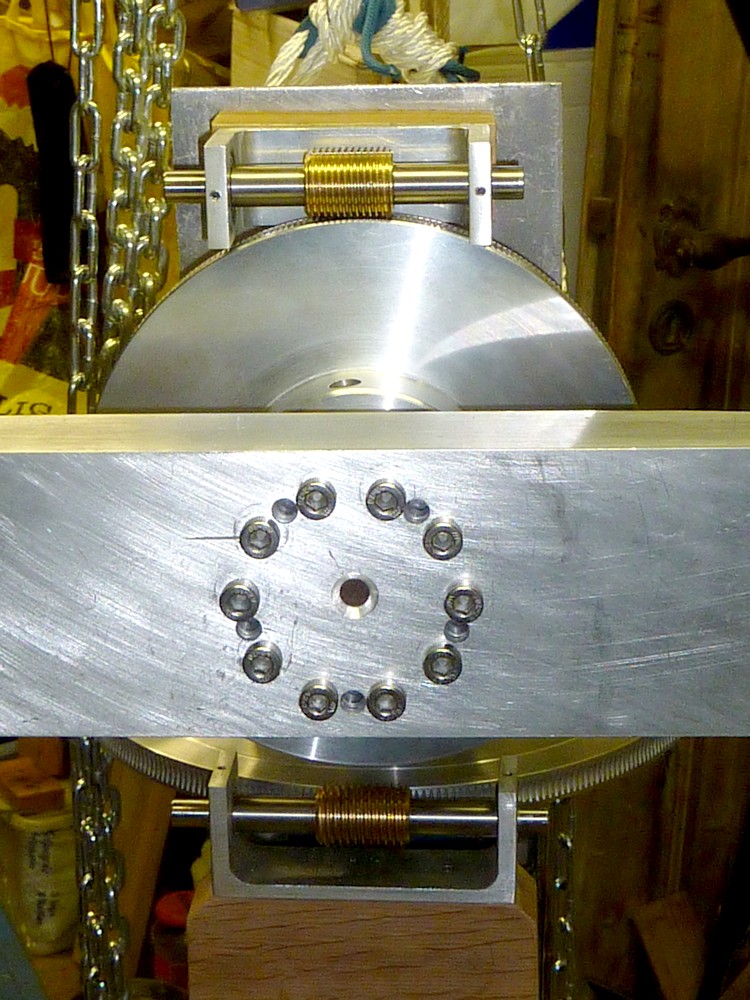
Image showing the 8.75" Declination wormwheel and worm above the 11.5" RA wormwheel. The saddle has been removed so I could work on the worm plate and clearance by elongating the worm fixing holes.
Some means of applying finely adjustable pressure to the worm housings would be beneficial.
This is the wrong end of the shaft because it is concave. It should be flat this end to allow a check for shaft depth in the Tollok bush through the saddle peephole. My lathe will not accept such long shafts to allow me to turn the end flat. So I will have to resort to an angle grinder.
Another view with the saddle in place. I have aligned both worms to show the difference in scale of both worms and wheels. Since the number of teeth [287] is the same in both cases the teeth and worm thread pitch are obviously different as the circumference of the wheels changes.
I have been considering for some time whether the channel section saddle needs reinforcement at the Tollok bush. Perhaps I should turn a miniature version of the large cylinder I used on the PA? While the circle of screws does apply pressure over quite a large area the saddle material is not thick enough in itself to be ultra stiff.

The M8 furniture cap nuts are proving difficult to obtain in any of the local DIY outlets. I used up the entire stock from the one place which did have old stock. They have promised to order more but who knows when they will arrive and what they will cost. I could order more from eBay[UK]but the postage of the only stockist of M8 doubles the already ridiculous price of £1 [$1.30] each! For a few little nuts! Crackers!
I just found a Danish stockist with prices to match my DIY outlet. I have ordered 20 and will now be able to finish what I have planned. My thinking is that using enough 8mm [5/16"] studs will stiffen the bearing housing as if they were made from sturdy square tubes. For this I need to be able to clamp the narrower, sandwiched plates as well. By compressing the plates in all directions it should actually be stiffer than a simple tube. The internal 'ironwork' of heavy and lighter studs adds its own structural benefits. By tensioning them they should greatly increase in lateral stiffness over simple rods.
I trued, smoothed and beveled both ends of the Declination shaft with an angle grinder to avoid 'handedness' when fitting. A bevel on a shaft is essential to ensure smooth entry into the bearings and other components.
Click on any image for an enlargement.
*
No comments:
Post a Comment